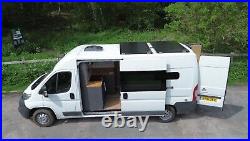
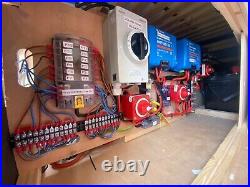


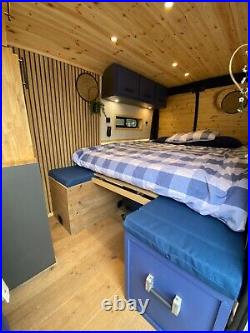

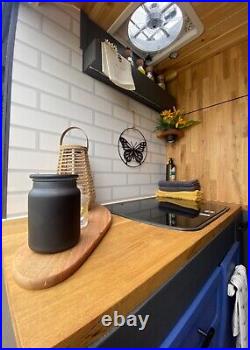
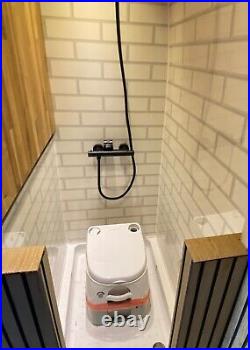
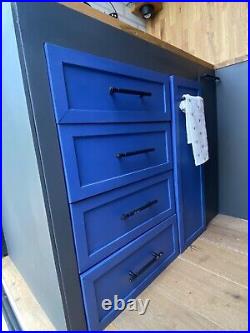
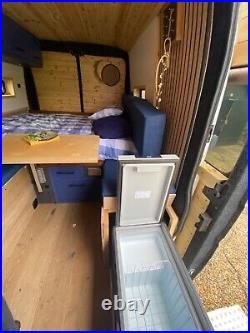

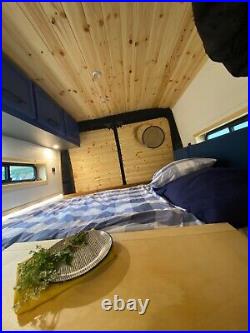
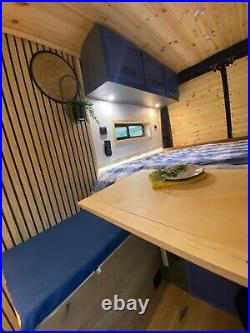
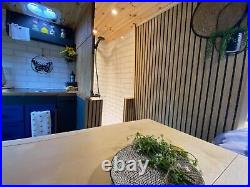

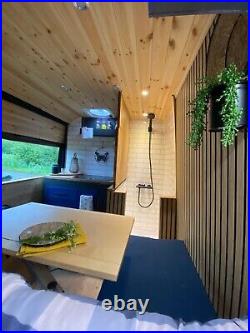
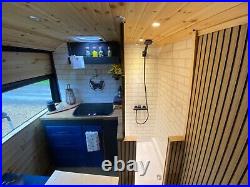

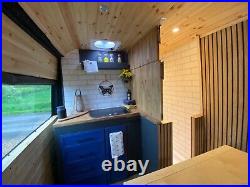


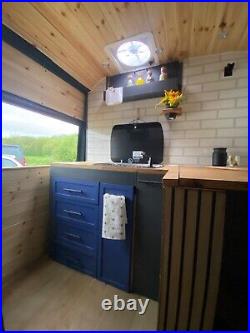

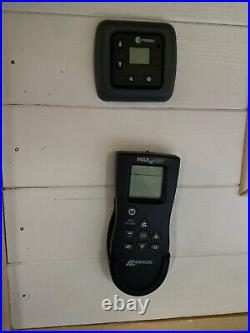

In normal set up the van sleeps two adults lying across the van width the bed measures 136cm x 182cm When in extended mode the bed can sleep three lying from back to front of the van this bed measures 182cm x 180cm this would comfortably sleep two adults and one child. Lets start with the van. It’s a 2016 white Citroen Relay L3H2 98747 miles on the clock. Mot until Jan 2024. Its has full service history and was serviced just 100 miles ago. It is immaculate both in the cab and outside the van. Now for the conversion. The design is a vision from YouTuber and van builder Nate Murphy who has mentored me through the entire van build process. Nates vision was to maximise the feeling of space. Many vans feel quite closed-in, but by being extremely efficient on space where every centimetre counts this van feels extremely spacious. On rainy days when you are cooped up inside this van offers a pleasant comfortable space to just chillout in. Clean and interconnecting lines throughout the van create a feeling of continuity creating a visual peace within the build with a minimalistic uncluttered space. A fixed bed means there is no faff of having to make and remake a bed everyday. The custom made memory foam mattress can be used as a double sleeping two cross ways in the van or after a few seconds of lowering the dining table you could sleep three from front to back on a super king-size bed. The aim of the van is not to just look sleek but to be a great and easy way to travel and enjoy on a daily basis. Nates designed this van to be the ultimate long-term, off-grid, van life experience. The lighting has been specifically designed to create several options for use. With six different lighting circuits you are able to create a range of both direct and indirect moods. These allow the van to range from a low-lit cosy paradise to a well-lit van for day-to-day life. In building the van I’ve used only the highest quality sustainable materials. A mix of pine, redwood and oak with hard wood ply panels and parquet flooring. Utilising solid materials allows the van to be refreshed over time allowing the van to grow old but remain timeless inside. The van is fully insulated using recycled plastic thermo fleece and Kingspan insulation panels with the van being fully lined with a vapour barrier. The kitchen has been handmade and topped off with a 27mm solid oak kitchen worktop. It comes with a Dometic twin burner hob along with an integrated sink and tap offering both hot and cold water. There is a dual output waste allowing for grey water to exit below the van or into a waste collection bottle below the sink. There are five heavy duty kitchen drawers to fill with all necessary food, cutlery, pots, pans and plates you could possibly need. The corner of the kitchen can be folded up using strong magnets to create a large walk-in shower and portable toilet. There is over head storage for clothes above one side of the bed and even more storage in two drawers under the bed for all those extra things you need to access from inside the van. There is large, insulated storage above the cab to enable the storage of extra blankets, coats and other items you may not need on a daily basis. A 35L Dometic fridge effortlessly slides out from under the seat into the kitchen to give a constant cold storage of chilled goods and can be set to freeze down to -17 should the need arise. During normal use the fridge/freezer uses a 12 volt supply to keep cold but can also be plugged into mains power if you get the opportunity to plug the van in. An underslung 25 litre LPG gas tank has been installed under the van and can be filled up via a filling point on the drivers side of the van at suitable filling stations this means no bulky gas tanks that need to be exchanged when you run out of gas. The LPG level can be monitored from within the van. The LPG supplies a Propex gas heater so on cold evenings you can set the temperature on the digital display to regulate the temperate within the van. It also provides the supply to the Malaga water heater giving you access to hot showers and hot water for washing up. This is operated and turned on from inside the van and the Malaga water heater can also be used on mains power when connected to a mains supply from outside the van. An internal 70 litre freshwater tank that can be filled from outside the van goes through a filter then into a pump and pressurisation vessel giving the required pressure for a quick hot shower within 20 minutes of switching the water heater on. Above the kitchen is a Maxx Air fan deluxe which can be opened and closed via the remote control. This can be use to extract air from the van or supply fresh air into the van with variable speed and temperature options. The show stopper for the van is the electrical set up. This is a fully off grid, certified system supplied by Tiny Build Electrics. With 590W of solar coming from two roof mounted solar panels. These supply the 230amph leisure battery and provide a constant charge. The power is all maintained by the Victron Connect system which can be monitored via the Victron Connect app. So with the touch of a button you can connect via Bluetooth to your entire electrical system to check how much solar you are producing and what level the battery is at. Using a Smart Shunt system the leisure battery is also charged when you are driving the van so there is no excuse for ever running out of battery in the van. The van has three double USB charge points and a double socket powered via a 1200w inverter giving you access to mains power where ever you go. Should you visit a site with access to mains power the van can be plugged in via the point installed on the side of the van. This will provide 240V power to the fridge, the Malaga water heater and the battery charger meaning you can top up the battery should the need arise. All in all this is a fantastic opportunity to own a van that is built for the adventurer opening the door for endless off-grid van-life. Its subtle looks from the outside and its stylish looks on the inside are not to be missed.


